Your shopping cart is empty!
Using RPM²
How to Perform Calibration Procedures
Standing Calibration
|
|
Cycle Calibration
|
|
Running Calibration Force Sensitivity
|
|
Running Calibration Power Meter Toggled Off
|
|
How to read Dashboard Reports
Hip Flexion
Hip Extension
Hip Abduction
Knee Extension
Toe Raise
Heel Raise
Standing Pressure
Half Squat
How to use the RPM² App (Android and iOS)
Mobile Application guide: For information regarding the RPM² Android and iOS application and how to use it Click here to View the RPM² Mobile Application Guide
Android ANT+ guide: For information regarding the RPM² Android ANT+ technology and how to use it Click here to View the RPM² Android ANT+ Guide
iOS ANT+ guide: For information regarding the RPM² iOS ANT+ technology and how to use it Click here to View the RPM² iOS ANT+ Guide
RPM ² Low Power Mode
We have found that many of our users travel with their inserts and need them to hold a charge for multiple days at a time. By placing your RPM² inserts into Low Power Mode, they will still be usable after several days of inactivity.
Low Power Mode on the RPM² allows the inserts to retain more battery life over time while they are not in use. It conserves charge by disabling the ANT+ and Bluetooth antennas which cause the device to be undiscoverable while in this mode.
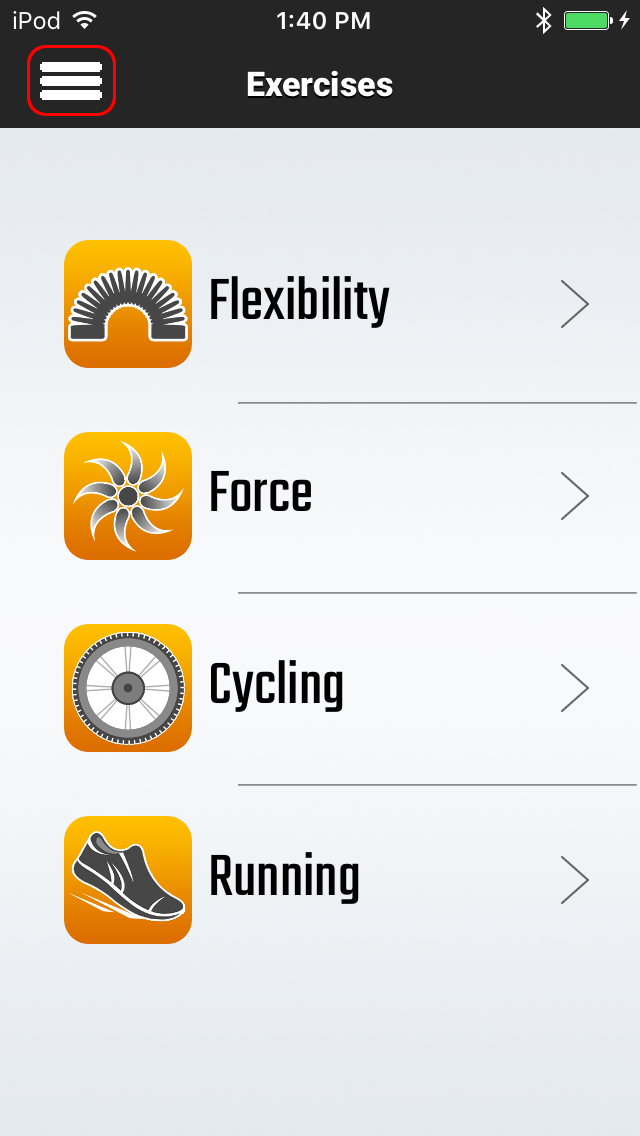
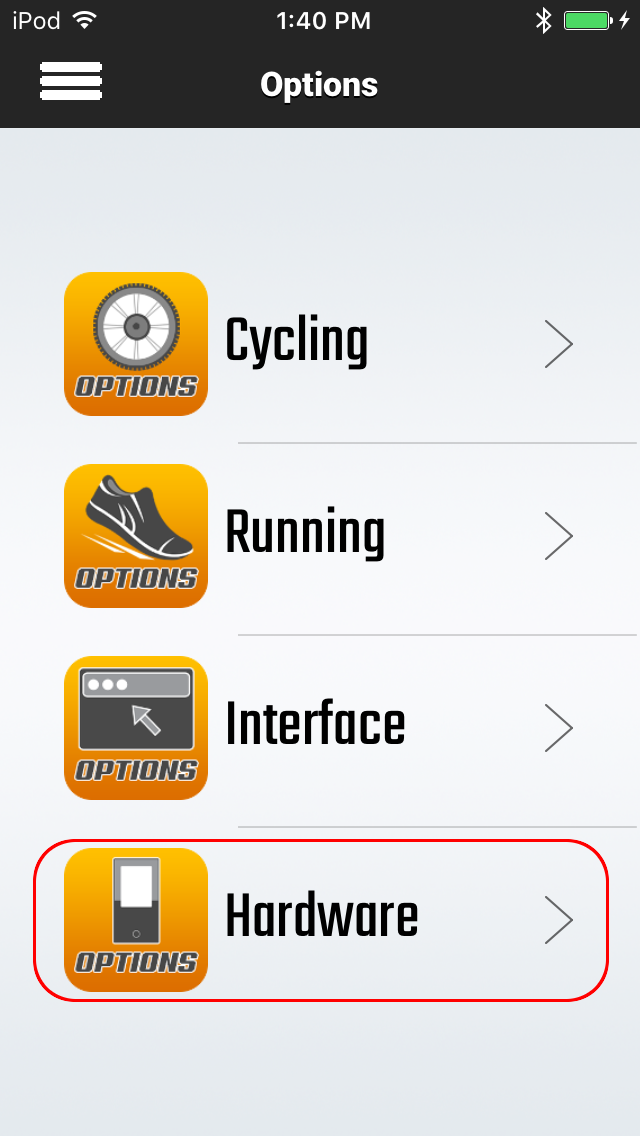
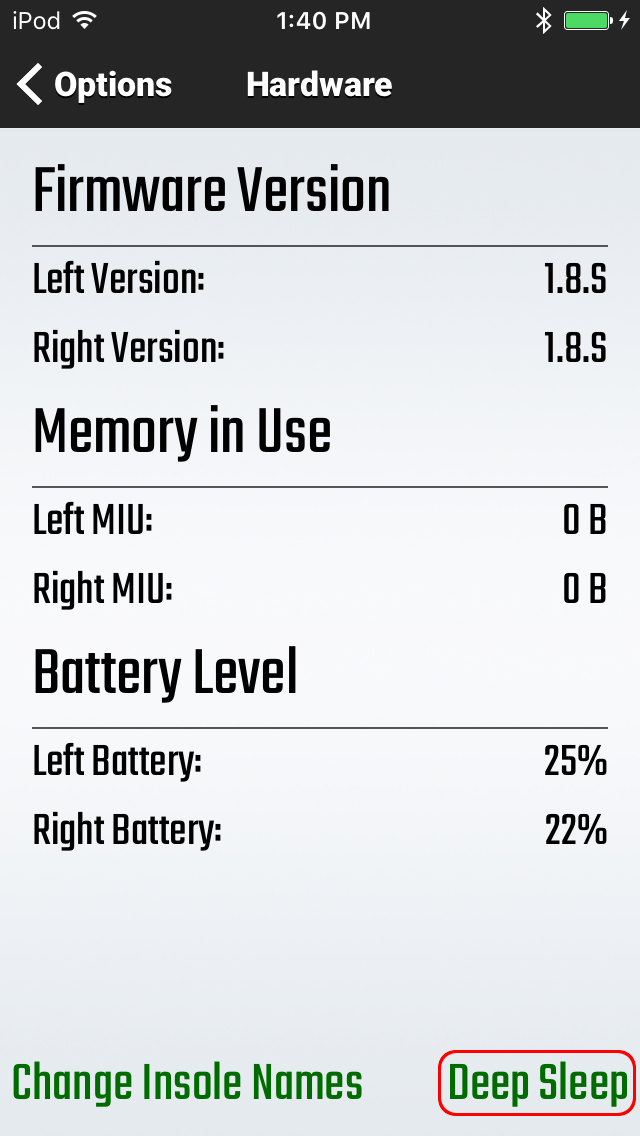
To place your inserts into Low Power Mode, simply connect them to the RPM² application and navigate to the options menu and then hardware. You will see a button on that screen labeled “Deep Sleep”. When this button is pressed, the Bluetooth and ANT+ antennas will be disabled and your insoles will disconnect from your phone or tablet.
Insole Renaming
Step 1: Go to options menu in application.
Step 2: Click on Hardware.
Step 3: Click on Change Insole Names.
Step 4: Enter the new names of your insoles, i.e. John1 and John2 for left and right insoles, respectively.
Step 5: Click Change.
Step 6: To check for the change, get out of the application completely. Go to Bluetooth, unpair any insoles that are connected.
Step 7: Scan for discoverable devices. If you don’t see John1 and John2, try scanning again or turn Bluetooth off and back on. Once you see your names, you can pair to them, then reopen the RPM2 application.
Recommended Use of RPM²
RPM² is designed as a tool to measure bilateral equivalence, gait analysis, and cycling mechanics to include a running and casual cycling power meter. Analysis provided by RPM² allows for the adjustment of training based on mechanical movements. In such, it is best to capture data on a weekly or bi-weekly basis. When RPM² is not used, simply replace RPM² inserts with factory or custom orthotics.
RPM² can also be used daily as a training device. In regard to training, it is recommended that test exercises using RPM² be tracked and saved at least once per week. Although test exercises can be performed more, or less frequently, one week intervals allow for training adjustments to be made in response to measurements provided during test exercise periods. As well, this allows for the customization of training, based on measurements provided by RPM².
User Setup Instructions
Step 1: Plug in charging mat.
Step 2: Place heel of insert (charge one at a time) on mat to begin charging. Full charge takes 1 hour per insert. Please follow instructions as listed below for RPM² Charging Mat Instructions.
Step 3: Register, Pair, and Connect your insoles to the RPM² app. Click Here For Android or Click Here For iOS
Step 4: Once charging is complete, remove factory inserts from shoes and replace with RPM² inserts. Once testing, or training, is complete, remove RPM² inserts from shoes and place on charger (no harm in constantly charging), or place them in a safe environment for next use. It is healthy to always reboot RPM² before each use.
*We recommend using RPM² inserts only. However, they can be used with or without the original factory inserts, with or without custom inserts, or both with the RPM² inserts if comfortable.
RPM² Charging Mat Instructions
|
|
Insoles must be fully charged prior to each use. This is especially important for individuals who will be performing biking and/or running exercises.
**The Charging Mat is a single charging system. Only charge one insert at a time. Do not stack the inserts on top of each other while charging.
How to Register, Pair, and Connect to your Insoles Using an Android Device
|
Step 1: Download the RPM² app
|
How to Register, Pair, and Connect to your Insoles Using an iOS Device
|
Step 1: Download the RPM² app. Before continuing with setup make sure that your insoles are charged and within 30 feet of your device.
|
How to Pair your RPM² Insoles to your Garmin Unit
|
Step 1: Pair your insoles to your smartphone.
|
How to Download the RPM² App/Android Users
Step 1: Go to Google Play
Step 2: Search for RPM²
Step 3: Tap Install
Step 4: Accept the permissions listed and the Application will begin to install.
How to Download the RPM² App/iOS(Apple) Users
Step 1: Open the “App Store” application
Step 2: Search for RPM²
Step 3: Install the Application from MedHab LLC
To wake your insoles from Low Power Mode, place them on an RPM² charger or use the black and green reboot cables on each insert to reboot them.
RPM² Cleaning Procedure
RPM² inserts may be cleaned daily without impact to the device. If cleaning is desired, a disinfectant wipe, or a general all-purpose anti-bactericidal gel can be applied. It is recommended to use a product that makes available pre-soaked cloths or wipes with the appropriate amount of disinfectant. This avoids the need to apply liquid directly on the insert. To avoid skin allergies, the use of gloves while cleaning is recommended. Under no circumstance should the inserts be submerged in liquid of any kind.
RPM² Charging Mat Cleaning Procedure
RPM² charging mats may be cleaned daily without impact to the device. If cleaning is desired, a disinfectant wipe, or a general all-purpose anti-bactericidal gel can be applied. It is recommended to use a product that makes available pre-soaked cloths or wipes with the appropriate amount of disinfectant. This avoids the need to apply liquid directly on the charging mat. To avoid skin allergies, the use of gloves while cleaning is recommended. Under no circumstance should the charging mat be submerged in liquid of any kind.
Assistance:
For Assistance view the troubleshooting document first then contact Customer Care 855-478-2564 if your issue was not resolved.